Azure Virtual Network Peering: Connecting Isolated Networks

azure vnet peering

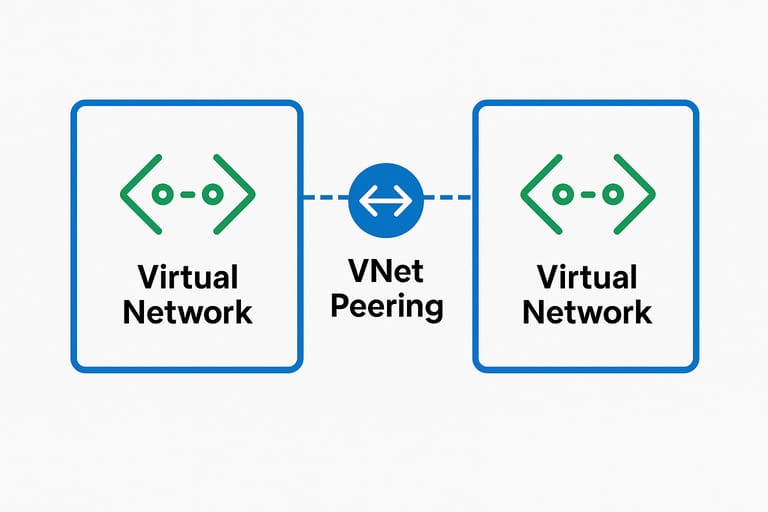
Azure Virtual Network (VNet) peering enables secure connectivity between separate virtual networks, allowing resources in different VNets to communicate as if they were on the same network. This capability is essential for distributed architectures, multi-tenant environments, and complex network topologies that span multiple virtual networks or even Azure tenants.

Understanding VNet Peering

Default VNet Behavior:

  • Subnets within the same VNet communicate freely via default NSG rules
  • VNets are isolated by design – no communication between separate VNets
  • Traditional connectivity requires VPN gateways or public internet routing

VNet Peering Benefits:

  • Low Latency: Traffic uses Microsoft backbone network
  • High Bandwidth: No gateway bottlenecks
  • Cross-Region Support: Connect VNets in different Azure regions
  • Cross-Tenant Support: Peer VNets across different Azure AD tenants
  • No Transitive Routing: Security through network isolation

Prerequisites

  • Azure Subscription with Network Contributor permissions
  • Multiple Virtual Networks in target regions
  • Non-overlapping Address Spaces between VNets
  • Virtual Machines for connectivity testing
  • Basic understanding of Azure networking concepts

Network Design Considerations

Address Space Planning

Critical Requirement: VNet address spaces cannot overlap

Example Valid Configuration:

  • VNet1: 10.0.0.0/16 (10.0.1.0/24 subnet)
  • VNet2: 172.16.0.0/16 (172.16.2.0/24 subnet)
  • VNet3: 192.168.0.0/16 (192.168.3.0/24 subnet)

Invalid Configuration:

  • VNet1: 10.0.1.0/24
  • VNet2: 10.0.1.0/27 ❌ (overlapping address space)

Peering Topology Models

Hub-and-Spoke:

  • Central hub VNet connected to multiple spoke VNets
  • No direct spoke-to-spoke connectivity
  • Requires hub routing for inter-spoke communication

Mesh:

  • Each VNet peered with every other VNet
  • Full connectivity between all networks
  • Increased complexity with scale

Step 1: Create Virtual Networks

Create Multiple VNets

VNet1 Configuration:

  1. Navigate to Virtual networks > Create
  2. Configure basic settings:
    • Name: vnet1-peering-demo
    • Region: East US
    • Address space: 10.0.0.0/16
    • Subnet name: subnet1
    • Subnet range: 10.0.1.0/24

VNet2 Configuration:

  • Name: vnet2-peering-demo
  • Region: East US (or different region for cross-region peering)
  • Address space: 172.16.0.0/16
  • Subnet: 172.16.2.0/24

VNet3 Configuration:

  • Name: vnet3-peering-demo
  • Region: East US
  • Address space: 192.168.0.0/16
  • Subnet: 192.168.3.0/24

Verify Network Configuration

  1. Navigate to Virtual networks
  2. Verify each VNet shows correct address spaces
  3. Confirm no overlapping ranges exist
  4. Check subnet configurations

Step 2: Deploy Virtual Machines

Create Test VMs

VM1 (VNet1):

  • Name: vm1-peering-test
  • Virtual network: vnet1-peering-demo
  • Subnet: subnet1
  • Private IP: 10.0.1.4 (or DHCP assigned)
  • OS: Ubuntu 20.04 LTS (recommended for networking tools)

VM2 (VNet2):

  • Name: vm2-peering-test
  • Virtual network: vnet2-peering-demo
  • Private IP: 172.16.2.4

VM3 (VNet3):

  • Name: vm3-peering-test
  • Virtual network: vnet3-peering-demo
  • Private IP: 192.168.3.4

Configure VM Access

Network Security Group Rules:

  • Allow SSH (port 22) for management
  • Allow ICMP for ping testing
  • Consider allowing HTTP (port 80) for web server testing

SSH Key Configuration:

  • Use same SSH key for all VMs
  • Enable password authentication for testing (if preferred)
  • Configure appropriate administrative access

Step 3: Verify Initial Isolation

Test Pre-Peering Connectivity

Before configuring peering, verify VNets are isolated:

From VM1 (10.0.1.4):

# Test connectivity to VM2
ping 172.16.2.4
# Expected result: Request timeout or Destination Host Unreachable

# Test connectivity to VM3  
ping 192.168.3.4
# Expected result: Request timeout or Destination Host Unreachable

Expected Behavior:

  • ❌ VM1 cannot reach VM2 or VM3
  • ❌ VM2 cannot reach VM1 or VM3
  • ❌ VM3 cannot reach VM1 or VM2

Step 4: Configure VNet Peering

Create VNet1 to VNet2 Peering

Configure Peering from VNet1:

  1. Navigate to Virtual networks > vnet1-peering-demo
  2. Select Peerings from the left menu
  3. Click Add

Peering Configuration:

  • Peering link name: vnet1-to-vnet2
  • Virtual network: Select vnet2-peering-demo
  • Allow traffic from remote virtual network: Enabled
  • Allow traffic forwarded from remote virtual network: Enabled (optional)
  • Allow virtual network gateway transit: Disabled (unless using VPN gateway)

Configure Peering from VNet2:

  1. Navigate to Virtual networks > vnet2-peering-demo > Peerings
  2. Click Add
  3. Configure reciprocal peering:
    • Peering link name: vnet2-to-vnet1
    • Virtual network: Select vnet1-peering-demo
    • Settings: Match VNet1 configuration

Verify Peering Status

  1. Check Peerings section in both VNets
  2. Status should show Connected for both directions
  3. If status shows Initiated, the reciprocal peering is missing

Step 5: Test VNet1 ↔ VNet2 Connectivity

Verify Bi-directional Connectivity

From VM1 to VM2:

# Test basic connectivity
ping 172.16.2.4

# Test with continuous ping
ping -c 10 172.16.2.4

# Test trace route
traceroute 172.16.2.4

# Test service connectivity (if web server installed)
curl http://172.16.2.4

From VM2 to VM1:

# Test return connectivity
ping 10.0.1.4

# Verify bidirectional communication
ssh azureuser@10.0.1.4

Expected Results:

  • ✅ VM1 and VM2 can communicate freely
  • ✅ Low latency (typically <1ms within same region)
  • ✅ SSH, HTTP, and other services work normally

Step 6: Configure VNet2 to VNet3 Peering

Create Second Peering Relationship

VNet2 to VNet3:

  1. Navigate to vnet2-peering-demo > Peerings
  2. Add peering to vnet3-peering-demo

VNet3 to VNet2:

  1. Navigate to vnet3-peering-demo > Peerings
  2. Add reciprocal peering to vnet2-peering-demo

Step 7: Test Transitive Routing Behavior

Verify No Transitive Connectivity

Test from VM1:

# VM1 should still NOT reach VM3
ping 192.168.3.4
# Expected: No connectivity (demonstrates no transitive routing)

# VM1 can still reach VM2
ping 172.16.2.4
# Expected: Successful connectivity

Test from VM3:

# VM3 should reach VM2
ping 172.16.2.4
# Expected: Successful connectivity

# VM3 should NOT reach VM1
ping 10.0.1.4
# Expected: No connectivity (no transitive routing)

Network Topology Summary

VNet1 (10.0.0.0/16) ←→ VNet2 (172.16.0.0/16) ←→ VNet3 (192.168.0.0/16)
        ↑                       ↑                        ↑
     VM1 Connected         VM2 Connected            VM3 Connected
                                ↑
                        Central hub position

Connectivity Matrix:

SourceDestinationStatus
VM1VM2✅ Connected
VM1VM3❌ No Route
VM2VM1✅ Connected
VM2VM3✅ Connected
VM3VM1❌ No Route
VM3VM2✅ Connected

Advanced Configuration Options

Cross-Region Peering

Global VNet Peering:

  • Connect VNets in different Azure regions
  • Additional bandwidth charges apply
  • Slightly higher latency due to geographic distance

Configuration Considerations:

  • Same configuration process as regional peering
  • Monitor cross-region bandwidth usage
  • Consider data sovereignty requirements

Cross-Tenant Peering

Azure AD Tenant Integration:

  • Peer VNets across different Azure AD tenants
  • Requires appropriate permissions in both tenants
  • Useful for partner integrations and acquisitions

Permission Requirements:

  • Network Contributor role in both tenants
  • Cross-tenant resource sharing enabled

Gateway Transit and Remote Gateways

Use Cases:

  • Extend on-premises connectivity through peered VNets
  • Share expensive VPN/ExpressRoute gateways
  • Centralize hybrid connectivity

Configuration:

  • Allow gateway transit: Enable on VNet with gateway
  • Use remote gateways: Enable on VNet without gateway

Monitoring and Troubleshooting

Monitoring Peering Health

Azure Monitor Metrics:

  • VNet peering connection status
  • Bytes in/out through peering connection
  • Packet drop count

Diagnostic Tools:

  • Network Watcher: Connection troubleshoot
  • Effective routes: Verify route propagation
  • NSG diagnostics: Check security group rules

Common Issues and Solutions

Peering Status “Initiated”:

  • Cause: Missing reciprocal peering
  • Solution: Create peering from destination VNet

Connectivity Fails After Peering:

  • Check NSG rules: Ensure traffic is allowed
  • Verify VM firewalls: Check OS-level firewall rules
  • Review effective routes: Confirm routes are propagated

Address Space Conflicts:

  • Symptom: Cannot create peering
  • Solution: Redesign address spaces to eliminate overlap

Security Considerations

Network Security Groups

Peering-Specific Rules:

  • Create NSG rules for cross-VNet traffic
  • Consider separate rules for peered network traffic
  • Implement least-privilege access principles

Traffic Flow Control

Inbound/Outbound Control:

  • Control traffic direction in peering configuration
  • Disable forwarded traffic if not required
  • Monitor for unexpected traffic patterns

Audit and Compliance

Logging Requirements:

  • Enable NSG flow logs for peered traffic
  • Monitor peering configuration changes
  • Regular review of peering relationships

Cost Optimization

Peering Charges

Regional Peering:

  • Inbound data transfer: Free
  • Outbound data transfer: Charged per GB

Global Peering:

  • Higher charges for cross-region traffic
  • Consider regional consolidation where possible

Cost Management:

  • Monitor bandwidth usage between peered VNets
  • Optimize application design to minimize cross-VNet traffic
  • Use Azure Cost Management for tracking

VNet peering provides a powerful and flexible way to connect Azure virtual networks while maintaining security boundaries and optimizing network performance. Understanding its non-transitive nature and proper configuration ensures reliable, secure, and cost-effective network connectivity across complex Azure architectures.

Azure Virtual Network Peering: Connecting Isolated Networks

Tags:

NAXS LABS
Logo