
You need to provide access to applications in your Okta org to users from another Identity Provider, such as Entra ID.
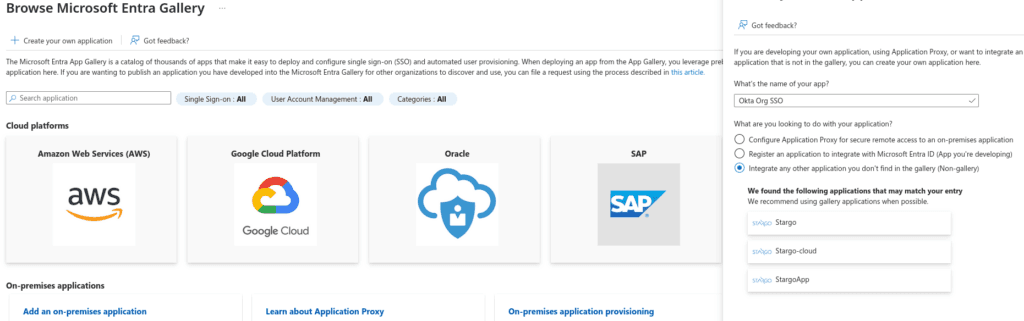
Log in to the Azure portal and navigate to the Entra ID blade. Choose Enterprise applications, then select New application, and choose Create your own application. There is no Okta application in the Entra Gallery similar to Org2Org, so it requires manual configuration. Give the new application a name and click Create. After the application is created, navigate to Single Sign-On.
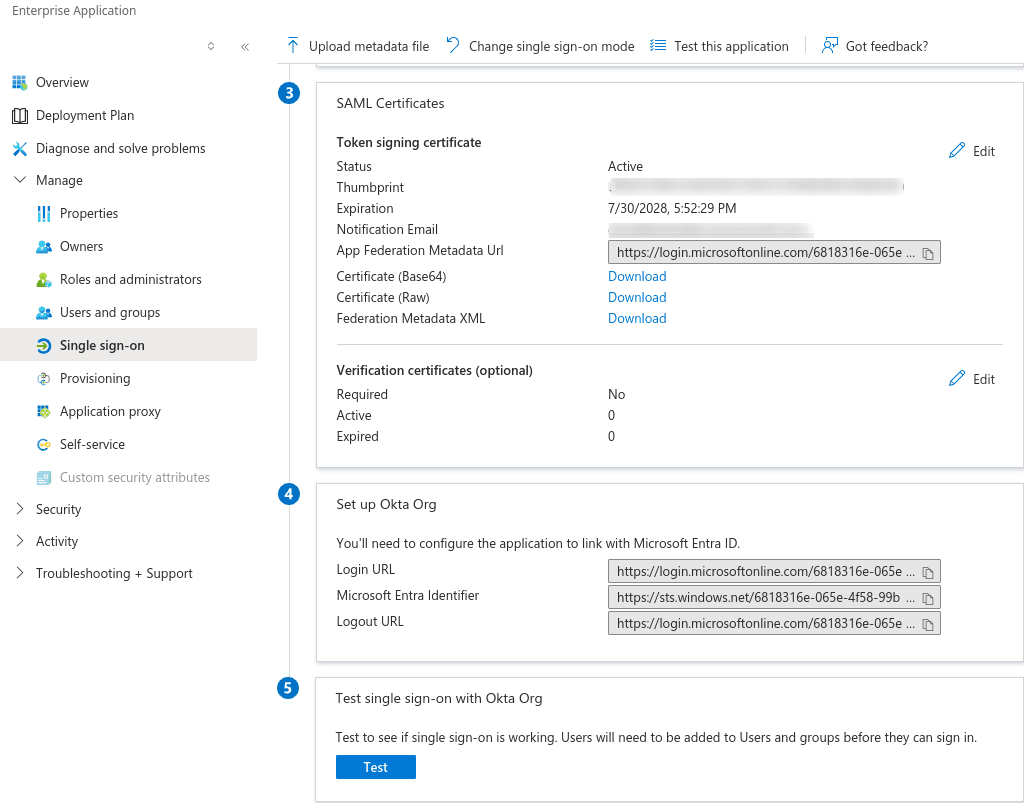
There are several sections under the Single Sign-On properties. You can start with section three and generate a new certificate by clicking “Edit,” then “New Certificate.” Download and save the certificate in Base64 format. From section four, take note of the Login URL and Microsoft Entra Identifier, and log into your Okta tenant if you haven’t already.
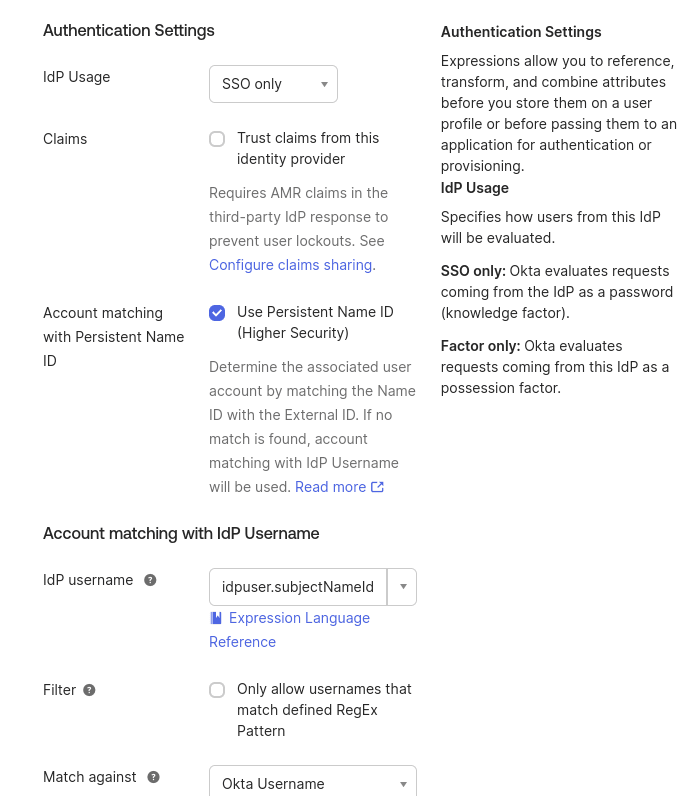
Create an IdP configuration in Okta by navigating to Security, then Identity Providers, Add Identity Provider, and select SAML 2.0 IdP. Give the IdP a name, and you can keep the default settings for the Authentication Settings, Account Matching, and JIT settings.
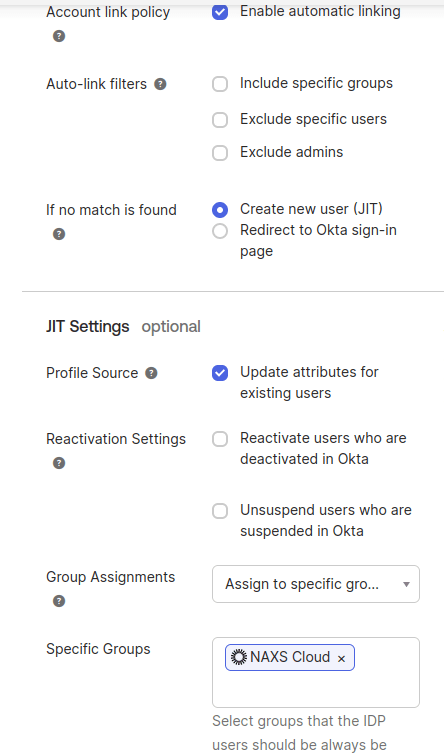
I’ve enabled automatic linking, “Update attributes for existing users,” and assigned a group for these identities to make managing global and authentication policies easier. If you don’t assign a group for these identities, they will be placed in the “everyone” group and subject to the default global, authentication, and enrollment policies. You may want more stringent or relaxed policies for these identities, and grouping them makes it easier to manage.
In the SAML Protocol Settings, upload the Base64 certificate and enter the IdP Issuer URI and IdP Single Sign-On URL. The IdP Issuer URL is the Microsoft Entra Identifier, and the IdP Single-Sign-On URL is the Login URL from section four in the Entra ID Application properties. Click finish to retrieve the Audience URI and Assertion Consumer Service URL. These addresses are entered in section one of your Entra ID application, with the Audience ID serving as the Identifier and the Assertion URI as the Reply URL.
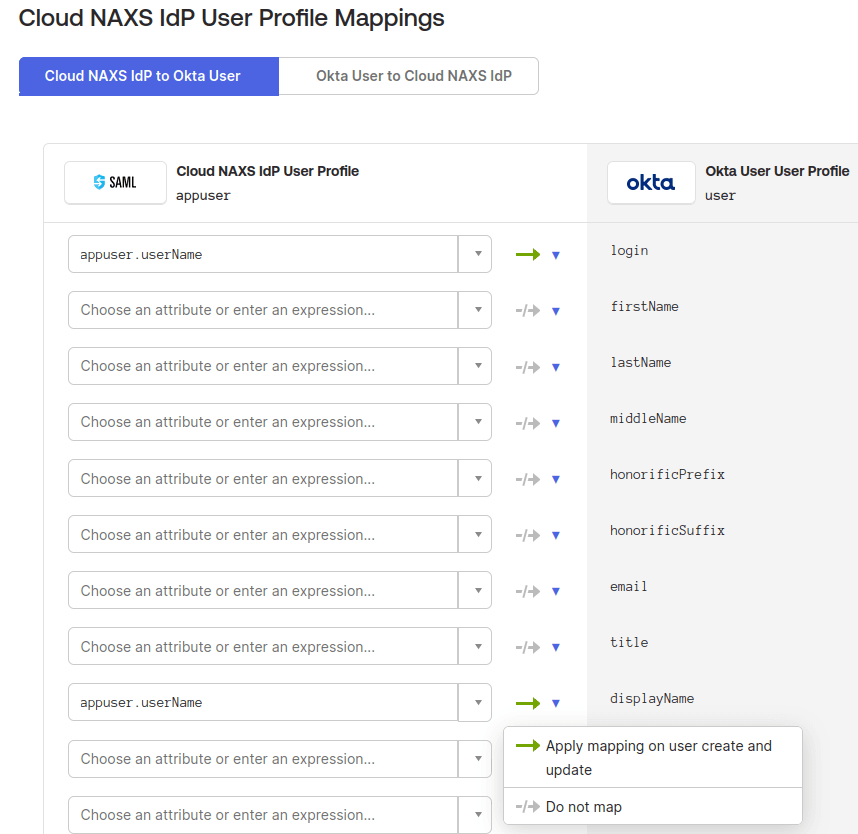
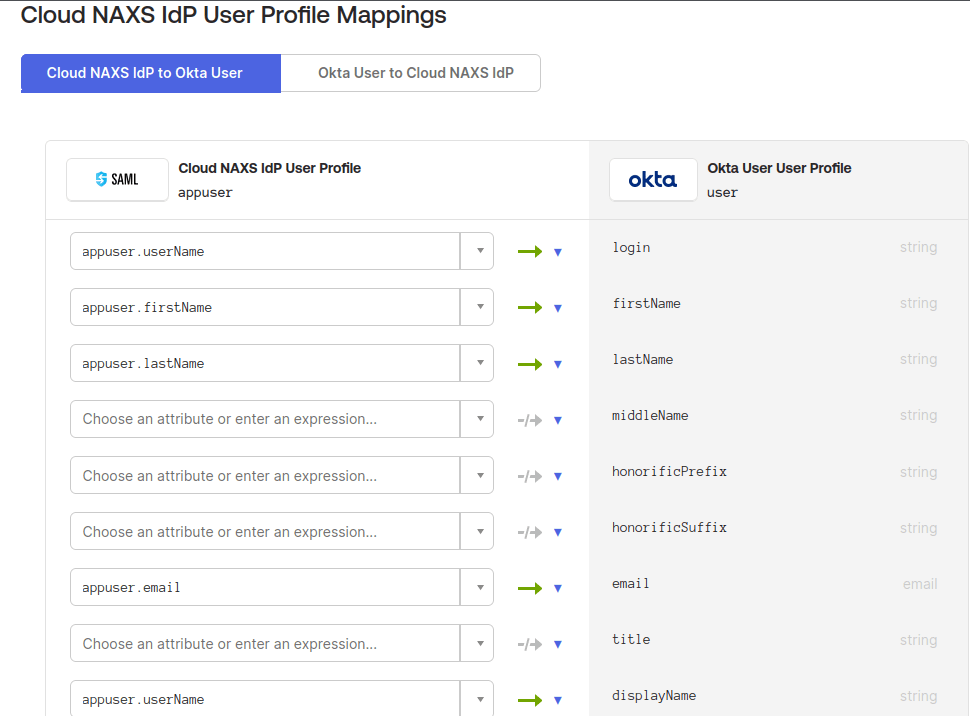
If attributes aren’t mapped correctly, the user will receive a General Nonsuccess error, and the logs will show Unable to JIT. We need to delete, re-create, and add some additional attributes, but first, they need to be unmapped.
Go to Directory, then Profile Editor in Okta. Find your IdP, select Mappings, and choose “Configure User mappings.” Then, for all attributes except Login, select the blue downward triangle and choose Do not map.
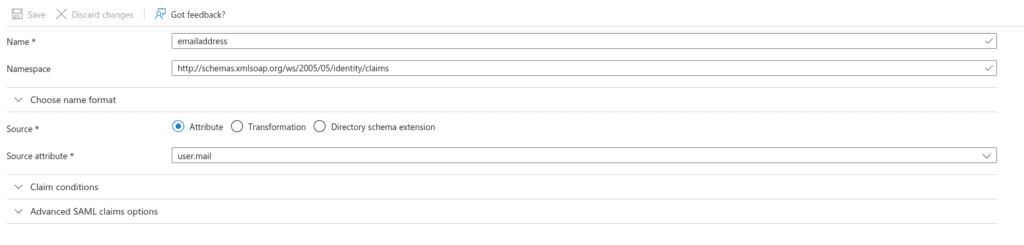
Next, delete all of the custom attributes for the IdP and recreate Email, First Name and Last Name – The namespaces for these are in section two of your Entra ID Application. For example, when creating the Email attribute, the External name is http://schemas.xmlsoap.org/ws/2005/05/identity/claims/emailaddress.
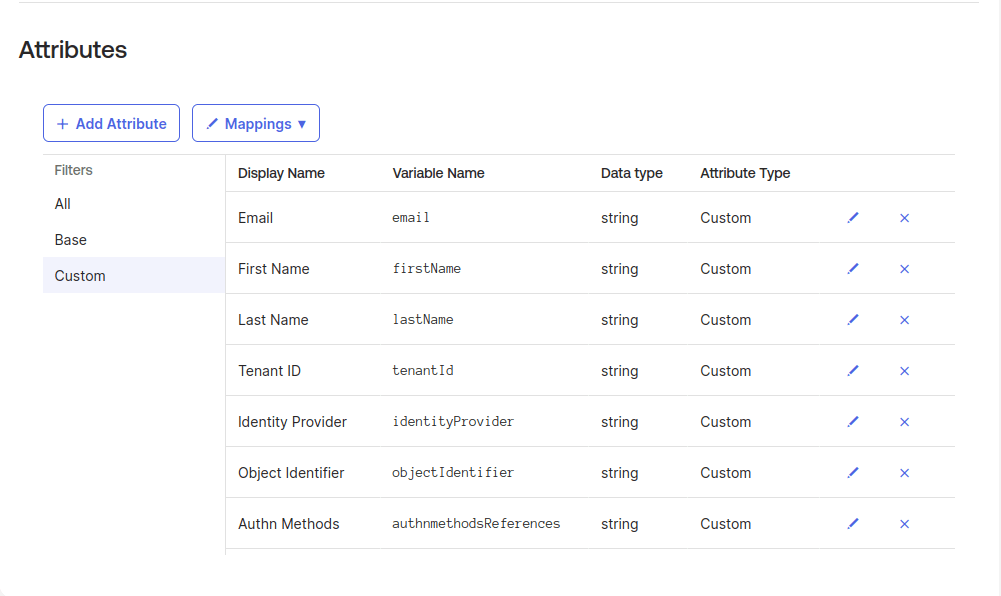
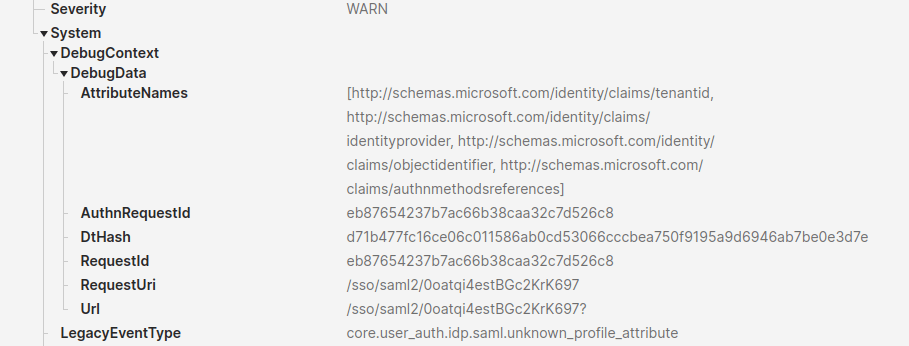
The TenantID, Identity Provider, Object Identifier, and Authn Methods claims were discovered through trial and error and reviewing the logs. After creating and mapping the first three attributes, you will still get an error. Reviewing the system logs and authentication failures indicates we’re missing some claims.
The DebugContext section displays the Tenant ID, Identity Provider, Object Identifier, and authentication methods, along with their respective namespaces. Create custom attributes for them using the addresses below for the External Name.
Finally, navigate to Profile Mappings and remap the firstName, lastName, email, and displayName attributes.
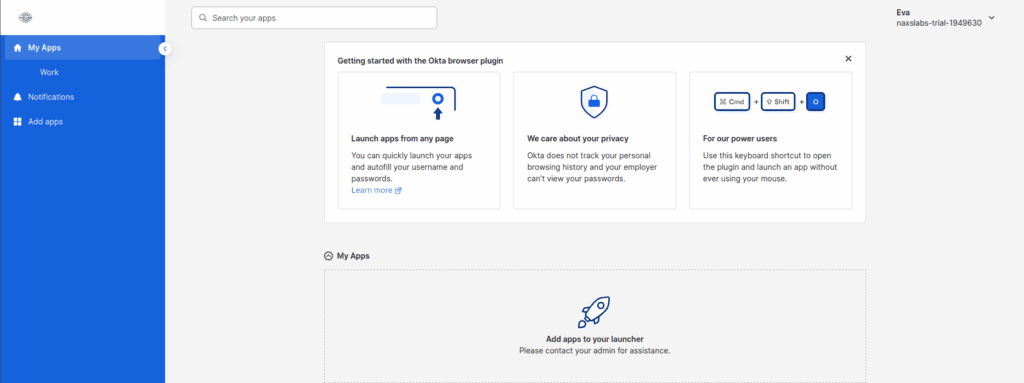
I’ve created an account for an Eva Garcia. This is her first time logging in to her apps dashboard, so she’ll need to change her password and set up multifactor authentication. Once she arrives on her dashboard at myapps.microsoft.com, she can click the Okta Org tile to log into the service provider and use any applications assign to her account.
© NAXS Labs All Rights Reserved
