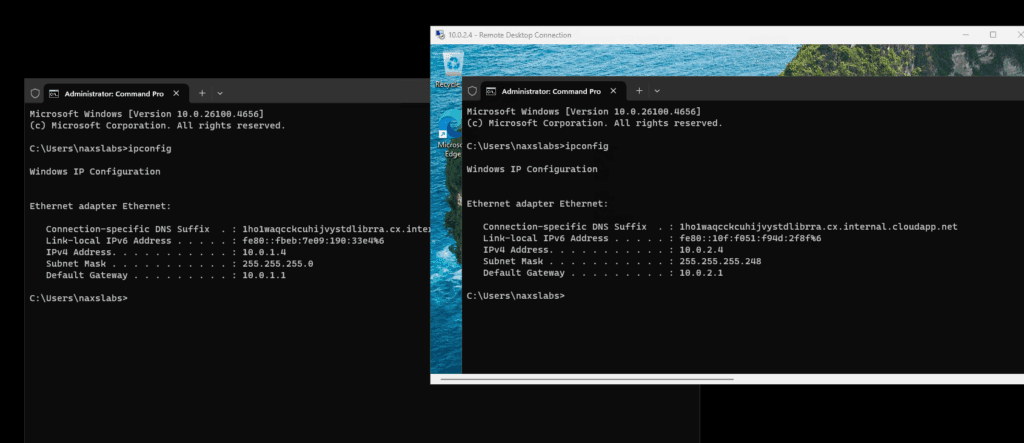
Controlling traffic between Azure subnets using route tables is another tool you can use to protect data alongside network security groups (NSGs). I’ve established an RDP session to VM1 via its public IP address. Then, another RDP session was created from VM1 to VM2.
VM 1: 10.0.1.4 – Security
VM 2: 10.0.2.4 – Media
Prerequisites / Requirements
Azure subscription with admin access
Existing virtual network with at least two subnets
Virtual machines deployed in each subnet
Step-by-Step Instructions
Step 1: Create a Route Table
In the Azure portal, search for RouteTable and click Create.
Place it in the same Resource Group and Region as your virtual network.
Step 2: Associate Route Table with Subnet
Navigate to the route table settings.
Select Subnets and associate the route table with the subnet you want to control. I’ll associate this route table with the Security subnet to prevent communication with the Media subnet.
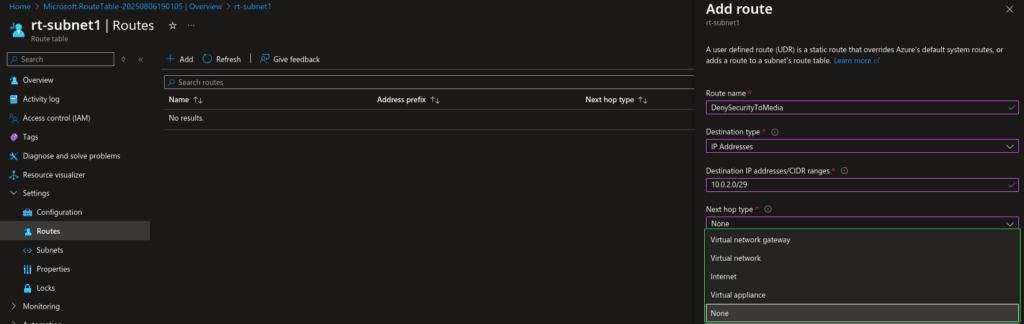
Step 3: Add a Deny Route
In the route table, add a new route.
Set Address Prefix to the subnet you want to block (e.g., Media subnet).
Set NextHopType to None to drop traffic.
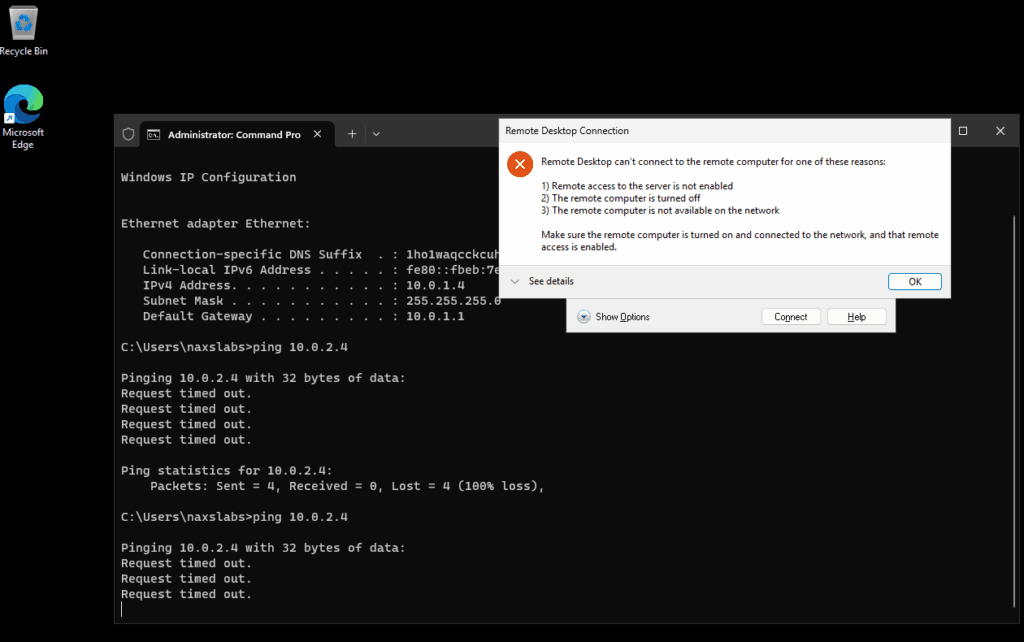
Step 4: Test Connectivity
The Security subnet can no longer communicate with the Media subnetwork. However, unlike network security groups where we specifically deny or allow access, communication in this example is unachievable because there is no route. Route Tables are applied at the subnet level, so all devices on that subnet will follow the rule, even if you’re denying access to a single IP address.