Automated VM Provisioning with OpenTofu and Proxmox Cloud Images
From manual VM creation to infrastructure-as-code with cloud-init templates and runtime variables
Managing virtual machines manually through the Proxmox web interface quickly becomes tedious as infrastructure grows. Every new VM requires clicking through the same configuration screens, copying settings, and hoping you didn’t miss a critical parameter. This guide transforms that manual process into automated, repeatable infrastructure-as-code using OpenTofu (a Terraform fork) and Ubuntu cloud images.
By the end of this tutorial, you’ll deploy VMs with a single command while specifying node, network, resources, and configuration—no file editing required.
Infrastructure-as-Code Architecture
Complete Automation Stack
↓
OpenTofu (Infrastructure Definition)
↓
Proxmox API (Orchestration)
↓
Cloud-Init Templates (Configuration)
↓
Deployed VMs
Prerequisites
- Proxmox VE cluster (single node or multi-node)
- Linux management machine with OpenTofu installed
- Root or administrative access to Proxmox
- NFS shared storage for templates (optional but recommended for multi-node)
- Basic understanding of Terraform/OpenTofu concepts
Part 1: Creating Ubuntu Cloud Image Templates
Cloud images are pre-configured OS images designed for cloud environments. They’re smaller than traditional ISO installations, boot faster, and integrate seamlessly with cloud-init for automated configuration.
Step 1: Choose Your Ubuntu Cloud Image
Ubuntu provides official cloud images for each release. Visit cloud-images.ubuntu.com and select your preferred version:
- Ubuntu 24.04 LTS (Noble) – Latest long-term support release
- Ubuntu 22.04 LTS (Jammy) – Previous LTS, excellent stability
- Ubuntu 20.04 LTS (Focal) – Older LTS for legacy compatibility
Step 2: Download and Create Template
SSH into your Proxmox node and execute these commands to create a reusable cloud-init template:
# Download Ubuntu cloud image (Noble 24.04 LTS)
wget https://cloud-images.ubuntu.com/noble/current/noble-server-cloudimg-amd64.img

# Create a new VM (ID 8000 - you can use any available ID)
qm create 8000 --memory 2048 --core 2 --name ubuntu-cloud --net0 virtio,bridge=vmbr0

# Import the downloaded image to your storage
# Replace 'local' with your storage name (iso, Thin, etc.)
qm disk import 8000 noble-server-cloudimg-amd64.img local

# Attach the disk to the VM with virtio-scsi controller
qm set 8000 --scsihw virtio-scsi-pci --scsi0 local:vm-8000-disk-0

# Add cloud-init drive for configuration
qm set 8000 --ide2 local:cloudinit

# Configure boot order
qm set 8000 --boot c --bootdisk scsi0

# Add serial console for troubleshooting
qm set 8000 --serial0 socket --vga serial0

# Convert VM to template
qm template 8000
⚠️ Important: Do Not Start the VM
Never start the base VM before converting it to a template. Configure all hardware settings and cloud-init options first, then immediately convert to template. Starting the VM will cause cloud-init to run, preventing it from executing properly on cloned instances.
Step 3: Distribute Template to Multiple Nodes (Multi-Node Clusters)
For multi-node Proxmox clusters, Proxmox cannot clone VMs from one node’s local storage to another node’s local storage. You have two options:
Option 1: Shared Storage (Recommended)
Store the template on shared NFS storage accessible to all nodes. This enables any node to clone from the shared template to its local storage.
# Move template disk to shared NFS storage
qm move-disk 8000 scsi0 shared

# Or copy directly to NFS and import
cp /var/lib/vz/images/8000/*.raw /mnt/pve/shared/images/8000/
Option 2: Local Templates per Node
Create a local template copy on each node. This avoids shared storage complexity but requires more disk space.
# On each additional node, copy and import template
qm create 8002 --name ubuntu-cloud --memory 2048 --cores 2 --net0 virtio,bridge=vmbr0
cp /mnt/pve/shared/images/8000/*.raw /var/lib/vz/images/8002/
qm importdisk 8002 /var/lib/vz/images/8002/vm-8000-disk-0.raw local
qm set 8002 --scsihw virtio-scsi-pci --scsi0 local:8002/vm-8002-disk-0.raw
qm template 8002
Part 2: OpenTofu Configuration
Step 1: Install OpenTofu
OpenTofu is an open-source Terraform fork. Install it on your management machine:
# Download and install OpenTofu (adjust for your OS/arch)
wget https://github.com/opentofu/opentofu/releases/download/v1.10.7/tofu_1.10.7_linux_amd64.zip
unzip tofu_1.10.7_linux_amd64.zip
sudo mv tofu /usr/local/bin/
tofu --version
Step 2: Create Proxmox API Token
OpenTofu requires API access to Proxmox. While you can use the admin account for testing, production environments should use a dedicated user with restricted permissions.
Quick Start: Using Admin Account
For testing purposes, you can use the built-in admin account. In production, create a dedicated user with minimal required permissions (VM.Allocate, VM.Config.*, Datastore.Allocate, Sys.Modify).
- Navigate to Datacenter → Permissions → API Tokens
- Click “Add”
- User: root@pam, Token ID: terraform
- Uncheck “Privilege Separation”
- Generate and save the token secret
Step 3: Create Infrastructure Directory Structure
# Create project directory
mkdir -p ~/infrastructure/proxmox
cd ~/infrastructure/proxmox

# Create .gitignore for sensitive files
cat > .gitignore << 'EOF'
*.tfstate
*.tfstate.*
.terraform/
.terraform.lock.hcl
terraform.tfvars
*.tfvars
*.key
*.pem
EOF
Step 4: Create OpenTofu Configuration Files
Create three files that define your infrastructure: providers, variables, and VM resources.
providers.tf - Proxmox Provider Configuration
terraform {
  required_providers {
    proxmox = {
      source  = "telmate/proxmox"
      version = "3.0.2-rc05"
    }
  }
}

provider "proxmox" {
  pm_api_url          = var.pm_api_url
  pm_api_token_id     = var.pm_api_token_id
  pm_api_token_secret = var.pm_api_token_secret
  pm_tls_insecure     = true
}
variables.tf - Runtime Variable Definitions
variable "pm_api_url" {
  description = "Proxmox API URL"
  type        = string
}

variable "pm_api_token_id" {
  description = "Proxmox API Token ID"
  type        = string
}

variable "pm_api_token_secret" {
  description = "Proxmox API Token Secret"
  type        = string
  sensitive   = true
}

variable "target_node" {
  description = "Proxmox node to deploy to"
  type        = string
  default     = "pve"
}

variable "vm_name" {
  description = "Name of the VM"
  type        = string
  default     = "test-vm"
}

variable "vm_id" {
  description = "VM ID"
  type        = number
  default     = 200
}

variable "vm_ip" {
  description = "IP address for the VM"
  type        = string
  default     = "10.0.0.100"
}

variable "vm_cores" {
  description = "Number of CPU cores"
  type        = number
  default     = 2
}

variable "vm_memory" {
  description = "RAM in MB"
  type        = number
  default     = 2048
}

variable "vm_disk_size" {
  description = "Disk size in GB"
  type        = number
  default     = 20
}

variable "vlan_tag" {
  description = "VLAN tag (optional)"
  type        = number
  default     = null
}

variable "use_dhcp" {
  description = "Use DHCP instead of static IP"
  type        = bool
  default     = false
}

variable "nameservers" {
  description = "DNS nameservers (comma-separated)"
  type        = string
  default     = "8.8.8.8,1.1.1.1"
}
main.tf - VM Resource Definition
resource "proxmox_vm_qemu" "vm" {
  name        = var.vm_name
  target_node = var.target_node
  clone       = "ubuntu-cloud"
  vmid        = var.vm_id

  cpu {
    cores   = var.vm_cores
    sockets = 1
  }
  memory = var.vm_memory

  # Boot configuration
  boot     = "c"
  bootdisk = "scsi0"
  scsihw   = "virtio-scsi-pci"
  agent    = 1
  balloon  = 0

  # Serial console for troubleshooting
  serial {
    id   = 0
    type = "socket"
  }
  vga {
    type = "serial0"
  }

  # Disk configuration
  disks {
    ide {
      ide2 {
        cloudinit {
          storage = "local"
        }
      }
    }
    scsi {
      scsi0 {
        disk {
          size    = var.vm_disk_size
          storage = "local"
          discard = "on"
          ssd     = true
        }
      }
    }
  }

  # Network with optional VLAN
  network {
    id     = 0
    model  = "virtio"
    bridge = "vmbr0"
    tag    = var.vlan_tag
  }

  # Cloud-init network configuration
  ipconfig0  = var.use_dhcp ? "ip=dhcp" : "ip=${var.vm_ip}/24,gw=10.0.0.1"
  nameserver = var.nameservers

  # SSH key (add your public key here)
  sshkeys = <<-EOF
    ssh-rsa YOUR_PUBLIC_KEY_HERE user@host
  EOF
}
terraform.tfvars - API Credentials (Do Not Commit)
pm_api_url          = "https://proxmox.example.com:8006/api2/json"
pm_api_token_id     = "root@pam!terraform"
pm_api_token_secret = "your-token-secret-here"
Part 3: Deploying VMs with OpenTofu
Initialize OpenTofu
cd ~/infrastructure/proxmox
tofu init
Deploy VMs with Runtime Variables
The power of this configuration is that you never need to edit files. All deployment parameters are specified at runtime:
Example Deployments
# Basic deployment with static IP
tofu apply -var="vm_name=web-01" -var="vm_id=301" -var="vm_ip=10.0.0.101"

# Deploy to specific node with custom specs
tofu apply -var="target_node=pve2" -var="vm_name=db-01" -var="vm_id=302" \
  -var="vm_ip=10.0.0.102" -var="vm_cores=4" -var="vm_memory=8192" -var="vm_disk_size=100"

# Deploy with DHCP on VLAN
tofu apply -var="vm_name=docker-01" -var="vm_id=303" \
  -var="use_dhcp=true" -var="vlan_tag=100"

# High-spec database server
tofu apply -var="vm_name=postgres-01" -var="vm_id=304" -var="vm_ip=10.0.0.104" \
  -var="vm_cores=8" -var="vm_memory=16384" -var="vm_disk_size=500"

# Custom DNS servers
tofu apply -var="vm_name=app-01" -var="vm_id=305" -var="vm_ip=10.0.0.105" \
  -var="nameservers=192.168.1.1,192.168.1.2"
Verify and Destroy
# Preview changes before applying
tofu plan -var="vm_name=test" -var="vm_id=999" -var="vm_ip=10.0.0.199"

# Destroy a VM when no longer needed
tofu destroy

# View current infrastructure state
tofu state list
tofu state show proxmox_vm_qemu.vm
Advanced Configuration Options
Custom Cloud-Init Configuration
For more advanced cloud-init configurations (custom users, packages, scripts), create a cloud-init config file and reference it in your template:
# Create cloud-init config file
cat > /var/lib/vz/snippets/user-data.yml << 'EOF'
#cloud-config
users:
  - name: admin
    sudo: ALL=(ALL) NOPASSWD:ALL
    shell: /bin/bash
    ssh-authorized-keys:
      - ssh-rsa YOUR_KEY_HERE
packages:
  - qemu-guest-agent
  - vim
  - curl
  - wget
runcmd:
  - systemctl enable qemu-guest-agent
  - systemctl start qemu-guest-agent
EOF

# Apply to template
qm set 8000 --cicustom "user=local:snippets/user-data.yml"
Multi-Node Storage Configuration
For clusters with different storage configurations per node, use conditional storage selection:
# In main.tf, replace storage = "local" with:
storage = var.target_node == "pve1" ? "Thin" : "local"

# This automatically selects:
# - "Thin" storage when deploying to pve1
# - "local" storage for all other nodes
Troubleshooting Common Issues
Boot Failure: "ALERT! LABEL=cloudimg-rootfs does not exist"
Cause: Incorrect SCSI controller or boot configuration
Fix: Ensure you're using virtio-scsi-pci controller and boot=c/bootdisk=scsi0 configuration
Cross-Node Clone Failure
Error: "can't clone VM to node 'X' (VM uses local storage)"
Fix: Either use shared storage for templates or create local template copies on each node
Cloud-Init Not Executing
Cause: Started VM before converting to template
Fix: Recreate template without starting the base VM. Cloud-init only runs once on first boot.
From Manual Clicks to Infrastructure-as-Code
You've transformed manual VM provisioning into a repeatable, automated process. What once required navigating through multiple Proxmox web interface screens now happens with a single command. Your infrastructure is now defined in code, version-controlled, and can be easily replicated across nodes.
What You've Accomplished
- Created reusable Ubuntu cloud image templates with cloud-init
- Configured OpenTofu for Proxmox VM management via API
- Implemented runtime variables for zero file editing deployments
- Established consistent VM deployment across multiple nodes
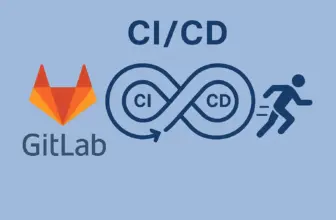
- Built foundation for advanced automation and CI/CD integration
Next Steps: Consider integrating this with GitLab CI/CD for automated deployments, implementing DNS automation to automatically register new VMs, or creating reusable OpenTofu modules for different application stacks. Your infrastructure is now code—treat it like code with version control, testing, and continuous deployment.