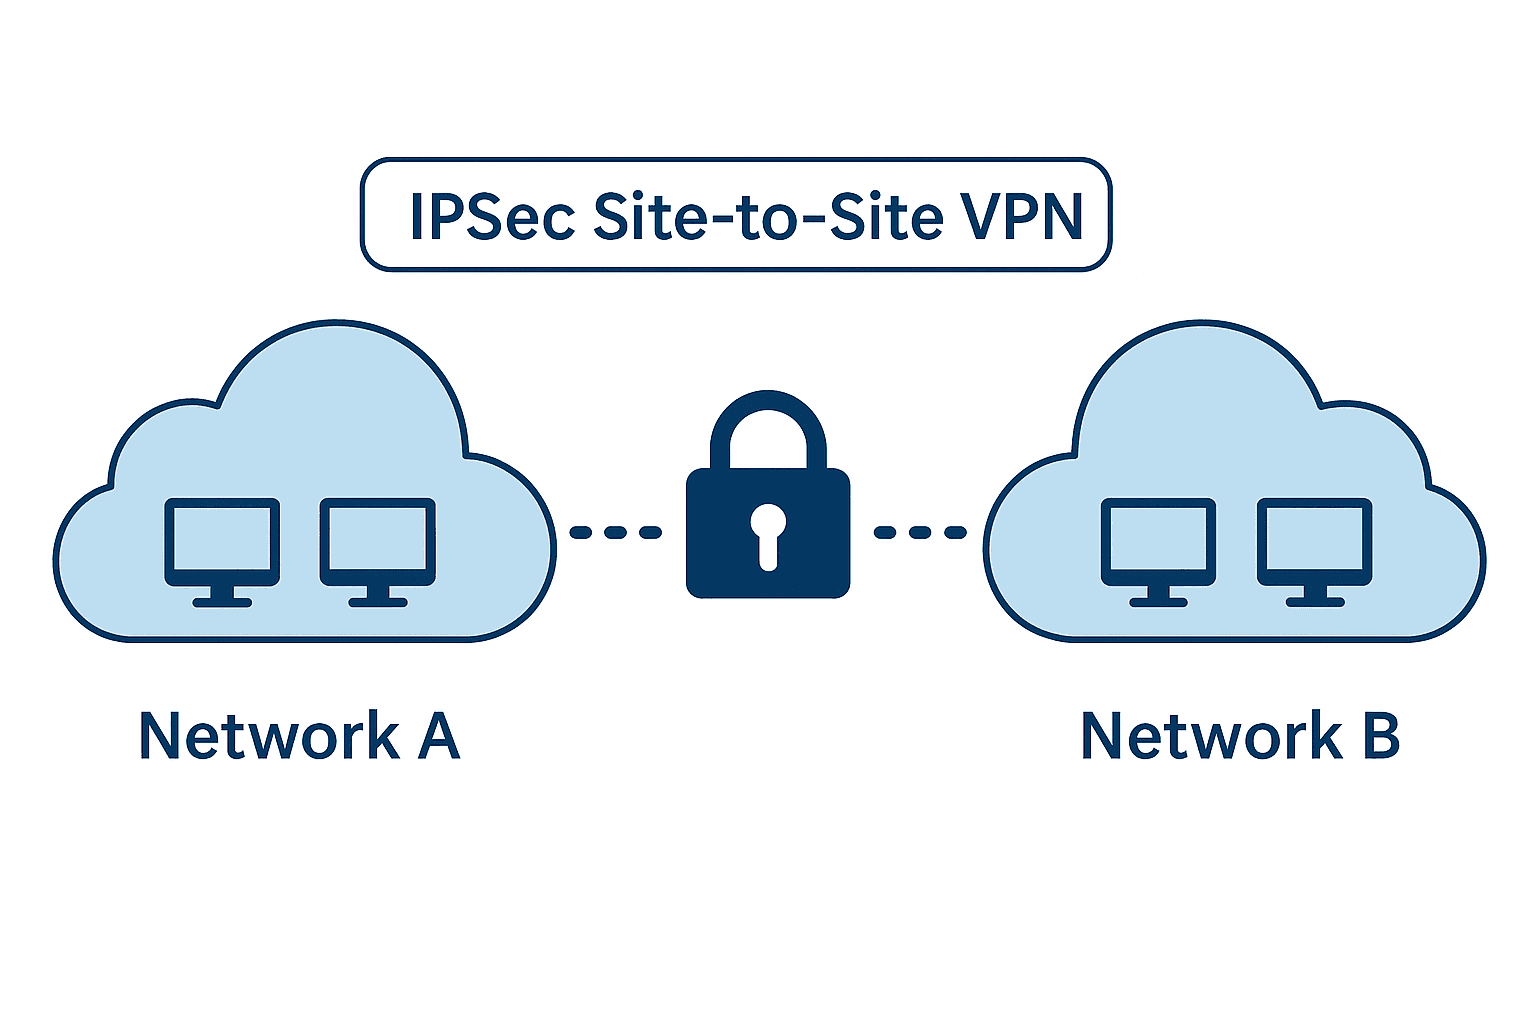
Internet Protocol Security (IPsec) provides a framework for securing IP communications through authentication, integrity checking, and encryption. Industries handling protected health information (PHI) under HIPAA regulations or payment card data under PCI-DSS standards require encryption mechanisms to ensure data confidentiality and integrity during transit across public networks.
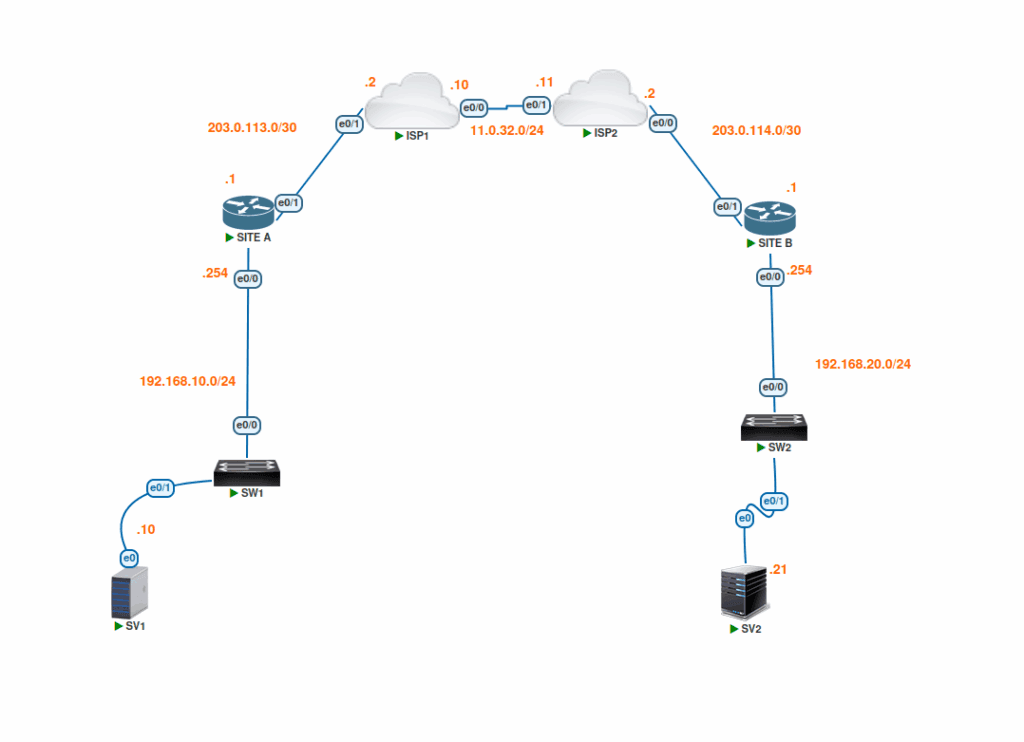
Site A Network: 192.168.10.0/24
Sensitive Asset/SV1: 192.168.10.10
Site B Network: 192.168.20.0/24
Sensitive Asset/SV2: 192.168.20.21
Site A WAN Interface: 203.0.113.1/30
Site B WAN Interface: 203.0.114.1/30
There is connectivity between Site A and B prior to IPsec configuration and we know the channel is unencrypted because we can see the ICMP packets.


Phase 1 establishes the initial relationship between Sites A and B. You can adjust the following settings as needed as long as both sides match.
crypto isakmp policy 1
encryption aes
hash sha256
authentication pre-share
group 2
lifetime 86400
crypto isakmp key NAXSLABS address 203.0.114.1
Repeat at Site B but reverse the address.
Create an access-list for the interesting traffic. In my example it is traffic between 192.168.10.0/24 and 192.168.20.0/24.
ip access-list extended NAXSLABSVPN-ACL
permit tcp 192.168.10.0 0.0.0.255 192.168.20.0 0.0.0.255
Repeat at Site B but reverse the address spaces. [permit 192.168.20.0 0.0.0.255 192.168.10.0 0.0.0.255]
In phase two we configure how data is protected inside the tunnel. This part of the configuration (Transform Set) encryption algorithms, ESP, AH and transport or tunnel modes are chosen. The transform-set get attached to a crypto map, then the map gets attached to an interface.
crypto ipsec transform-set NAXSLABSTS esp-aes esp-sha256-hmac
exit

crypto map NAXSLABSCM 10 ipsec-isakmp
set peer 203.0.114.1
set transform-set NAXSLABSTS
match address NAXSLABSVPN-ACL
exit

interface e0/1
crypto map NAXSLABSCM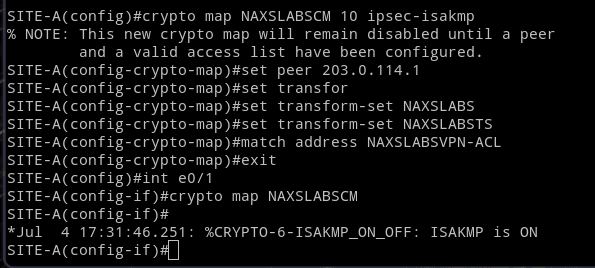
Repeat at Site B but change the peer address.
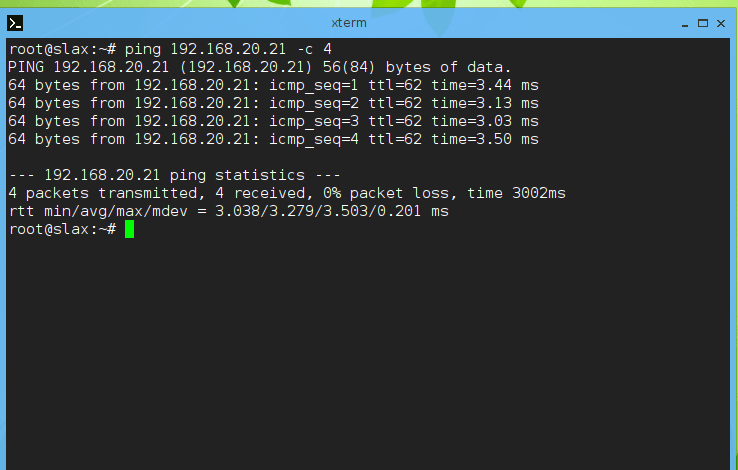
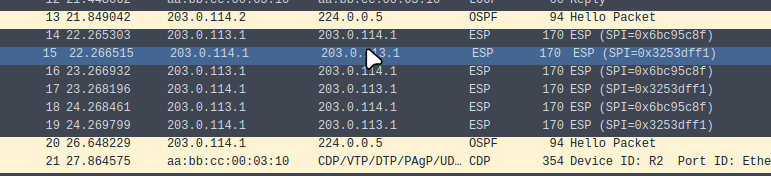
Begin a Wireshark capture and send an ICMP request between SV1 and SV2. You should only see ESP packets if configured correctly.
If you’re setup has NAT, remember to exclude any networks using the tunnel from your NAT translation access list.
© NAXS Labs All Rights Reserved
